Data quality scores (DQ scores) enable you to measure your data's quality. A higher DQ score indicates better accuracy and completeness of the data. To provide data quality capabilities, erwin Data Intelligence (erwin DI) integrates erwin Data Quality as a data quality analysis partner. To run data quality profiling, you need to configure erwin Data Quality in your erwin DI application.
Configuring erwin Data Quality in erwin DI requires Client ID and Client Secret details available in your erwin Data Quality instance. To get configuration details from erwin Data Quality instance, refer to the Accessing erwin Data Quality Configuration Details section.
erwin Data Quality now supports Single Sign-On (SSO). For more information, refer to erwin Data Quality SSO guide.
To configure erwin Data Quality, follow these steps:
- Go to Application Menu > Settings > Miscellaneous Configurations.
The Miscellaneous Configuration page appears. - Click the Data Profiling Configuration tab.
The Data Profiling Configuration tab appears.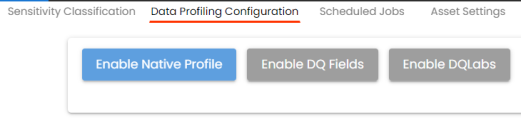
Use the following options for setting up data profiling configuration: - Enable Native Profile: Use this option to enable and configure a erwin Data Quality profile to sync erwin DI and erwin Data Quality and profile data.
- Enable DQ Fields: Specifies that only selected data quality parameters will be displayed across the assets in your organization.
- Enable DQLabs: Use this option to enable erwin Data Quality integration using connection details and schedule a sync job. For more information, refer to the Enabling DQLabs section.
Enabling DQLabs
To enable erwin Data Quality integration, follow these steps:
- On the Data Profiling Configuration tab, click Enable DQLabs.
- Click
 .
.
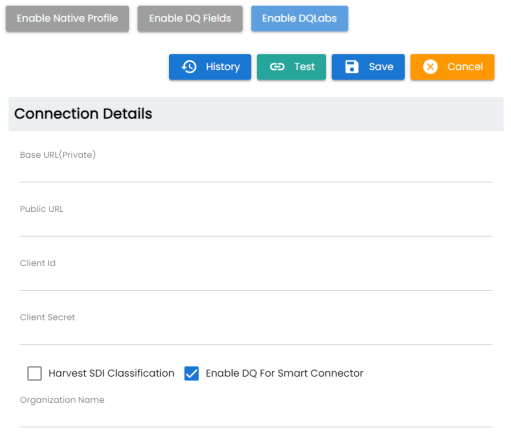
The DQLabs Configuration tab switches to edit mode and displays connection details. - Enter appropriate values in the fields. Refer to the following table for field descriptions:
- Click
 .
.
The erwin Data Quality configuration is saved.
This configuration requires Client ID and Client Secret from your erwin Data Quality instance. To get configuration details from erwin Data Quality instance, refer to the Accessing erwin Data Quality Configuration Details section.
|
Field Name |
Description |
|---|---|
|
Base URL (Private) |
Specifies the base URL of your erwin Data Qualitys instance. For example, https://cloud.dqlabs.ai |
|
Public URL |
Specifies the public URL of your erwin Data Quality instance. For example, https://cloud.dqlabs.ai |
|
Client Id |
Specifies the alphanumeric client ID of your erwin Data Quality instance. For example, 2ax1x3xde-b8x8-4b134-aa08-xxx303p2b86f1fk |
|
Client Secret |
Specifies the client secret of your erwin Data Quality instance. |
|
Harvest SDI Classification |
Specifies whether SDI classifications for technical assets are imported and updated in erwin Data Quality along with the DQ Score. |
|
Enable DQ For Smart Connector |
Specifies whether to sync the DQ Scores from erwin Data Quality for the assets based on smart connectors. |
|
Organization Name |
Specifies the organization name for the smart connector. This option is available when the Enable DQ For Smart Connector is enabled. Ensure that, the name in this filed matches the Organization Name field in erwin Data Quality portal's settings page. |
To test the configuration, click ![]() . If the connection with the erwin Data Quality instance is established successfully, then a success message appears.
. If the connection with the erwin Data Quality instance is established successfully, then a success message appears.
You can now access erwin Data Quality from erwin DI. To access erwin Data Quality, go to Application Menu > Data Quality.
The next steps involve adding datasets in the erwin Data Quality and then, scheduling an erwin Data Quality job.
Accessing erwin Data Quality Configuration Details
To access Client ID and Client Secret in your erwin Data Quality instance, follow these steps:
- Log in to erwin Data Quality.
Your erwin Data Quality instance opens. - On the app menu, click
 > Setting > Organization tab.
 - Click Edit, then go to Systems tab and expand Api section.
The Api section displays the Client ID and Client Secret.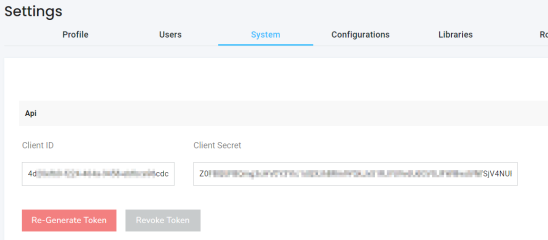
- Hover over the values and click
 to copy them, and paste them into erwin DI's erwin Data Quality Configuration section.
|
Copyright © 2026 Quest Software Inc. |